Cloudflare Tunnels: Deploying Secure Applications With Docker Compose
Deploying applications from your home lab or private network to the internet has always been a trade-off between accessibility and security. Cloudflare Tunnels offer a powerful solution to expose locally hosted web applications to the internet while benefiting from the global network of Cloudflare.
In this step-by-step tutorial, we will walk you through the process of setting up and configuring Cloudflare Tunnels to securely access your local web application from anywhere. We will also explore how to deploy your application using Docker Compose, a popular containerization tool, to streamline the deployment process.
By the end of this tutorial, you’ll have a deeper understanding of Cloudflare Tunnels and Docker Compose, empowering you to deploy your applications with confidence.
Prerequisites
Before we embark on this tutorial, let’s ensure that you have everything you need to get started:
- A Cloudflare account: If you don’t already have one, you can sign up for a free Cloudflare account.
- Docker and Docker Compose: These tools are essential for containerizing and orchestrating your web application. You can download Docker and Docker Compose.
- Basic familiarity with Docker and networking concepts will be beneficial.
- Optional: A Linux server running Docker and Docker Compose to host your app.
Understanding Cloudflare Tunnels
Cloudflare Tunnels provide a secure and efficient way to expose your locally hosted web applications to the global internet through Cloudflare’s edge network. Instead of directly exposing your application server to the public internet, Cloudflare Tunnels act as an intermediary, ensuring your application remains protected by Cloudflare’s robust security features.
By routing traffic through Cloudflare’s global network, you benefit from DDoS protection, Web Application Firewall (WAF) capabilities, SSL/TLS encryption, and the Content Delivery Network (CDN) for faster loading times. Furthermore, Cloudflare Tunnels use the WebSockets protocol, making them suitable for real-time applications.
Obtaining A Cloudflare Tunnel Token
Before we can set up Cloudflare Tunnels, we need to generate an authentication token. This token will be used to authenticate your Cloudflare Tunnel and associate it with your Cloudflare account.
Step 1: Log in to your Cloudflare account and navigate to the “Network” tab.
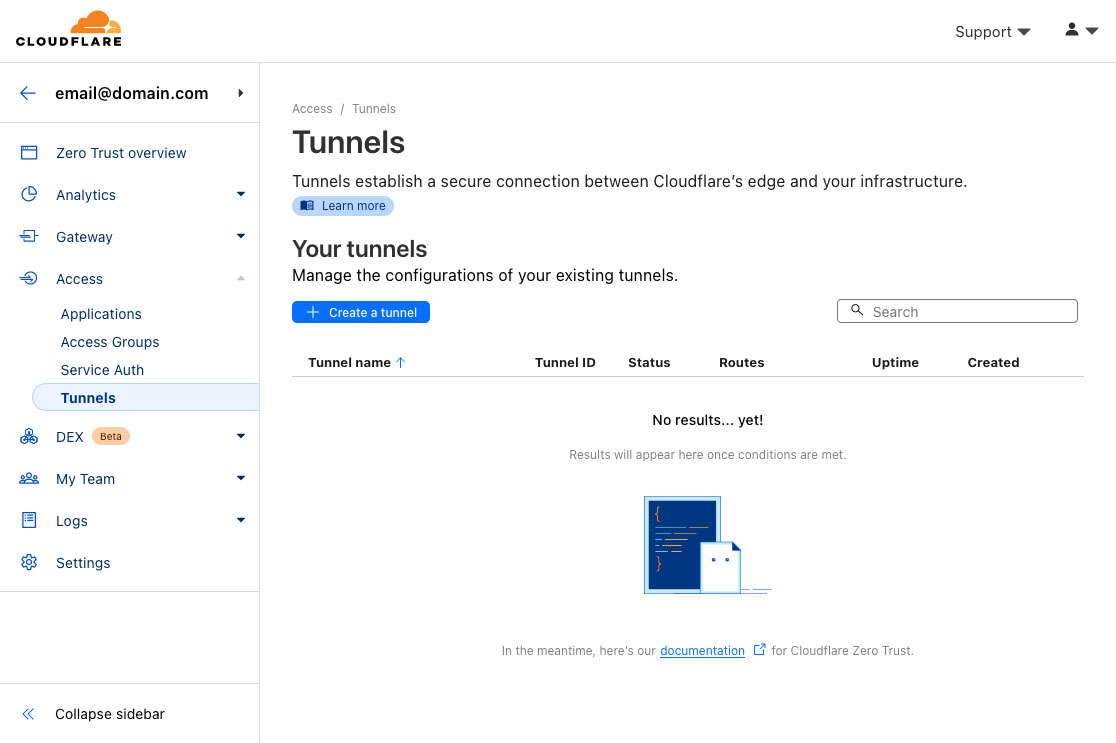
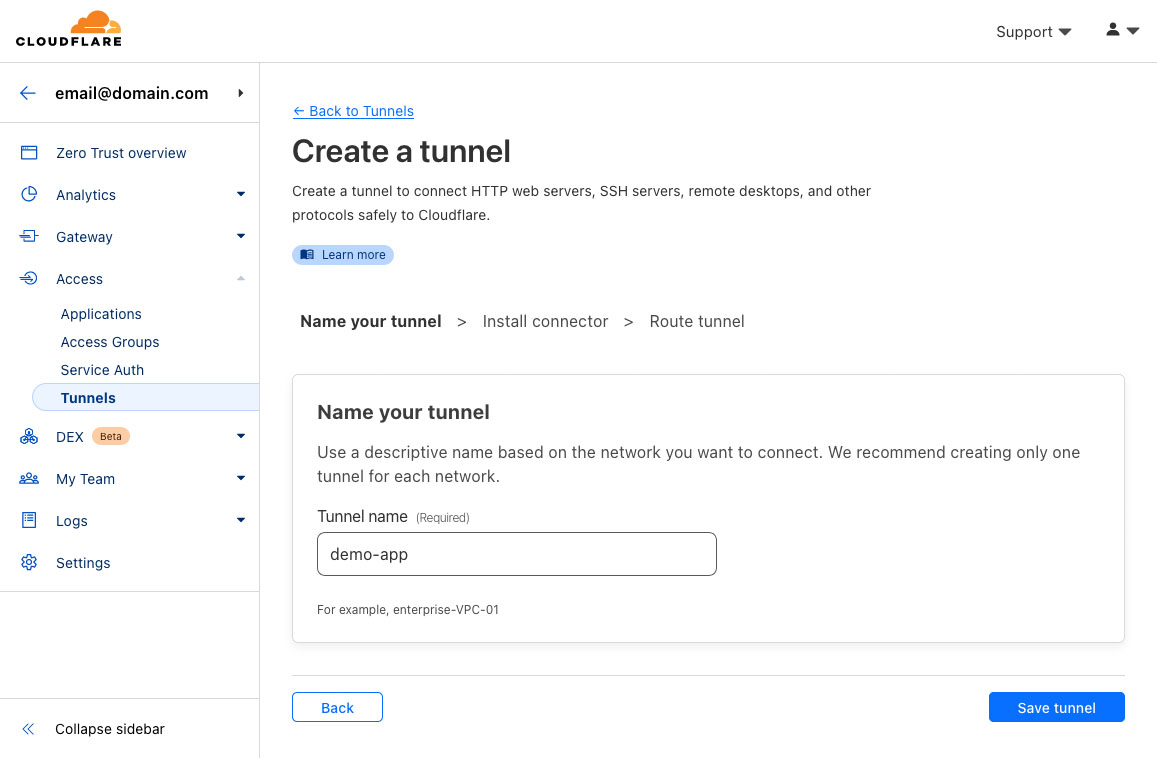
Step 2: Click on “Tunnels” in the side menu and then select “Create Tunnel.”.
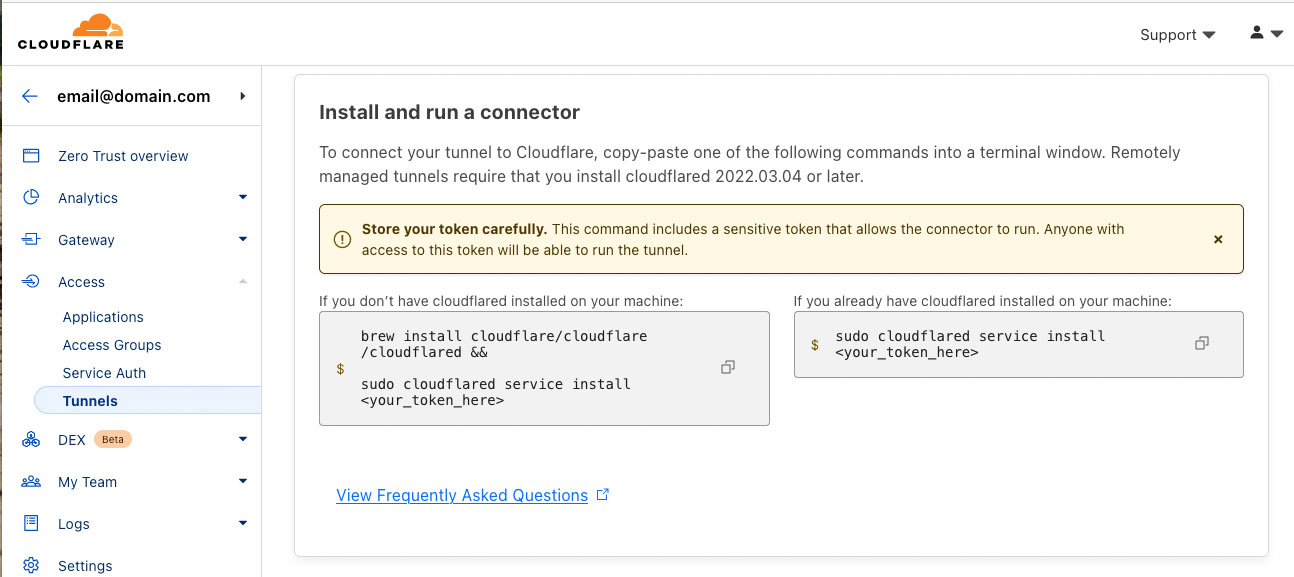
Step 3: Copy the token they give you (after the sudo cloudflared service install) on your computer. We’ll need it shortly!
Creating our demo app project
Creating a Docker Compose project is easy: All you need is a folder with a docker-compose.yml file in it.
1
2
3
mkdir demo-app
cd demo-app
touch docker-compose.yml
Creating the Docker Compose File
To simplify the deployment process, we’ll use Docker Compose, a tool for defining and running multi-container Docker applications. This allows us to set up our NGINX web server and Cloudflare Tunnel as services within the same environment.
Let’s update our docker-compose.yml file with the following configuration:
1
2
3
4
5
6
7
8
9
10
11
12
13
14
15
version: '3.7'

services:
  nginx:
    image: nginx
    restart: unless-stopped
    ports:
      - "80:80"

  cf-tunnel:
    image: cloudflare/cloudflared:latest
    restart: unless-stopped
    command: tunnel --no-autoupdate run
    environment:
      - TUNNEL_TOKEN=$CF_TUNNEL_TOKEN
Configuring the Docker Compose Environment
In the docker-compose.yml file, we use an environment variable. In order to provide that value, we’ll use a .env file we’ll create in the same folder as the docker-compose file.
1
touch .env
Once you’ve created your .env file, replace <YOUR_CLOUDFLARE_TOKEN> below with the Cloudflare Tunnel token you obtained in Step 2 and save the following line to the file we just created.
1
CF_TUNNEL_TOKEN=<YOUR_CLOUDFLARE_TOKEN>
Deploying the Application
With our Docker Compose file configured, let’s deploy our web application and Cloudflare Tunnel.
- Open a terminal or command prompt and navigate to the directory where the
docker-compose.ymland.envfiles are located. - Run the following command to start the NGINX web server and the Cloudflare Tunnel:
1
docker-compose up -d
Verifying the Deployment
After successfully deploying the application, it’s time to verify that everything is working as expected.
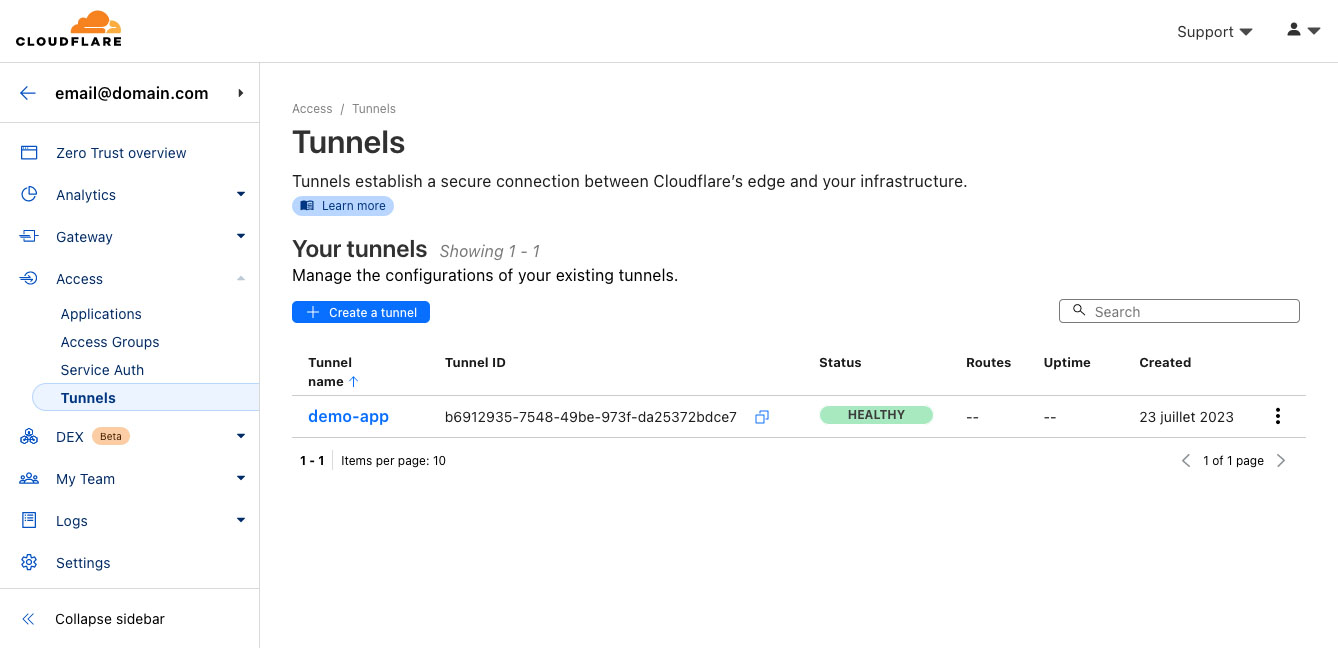
Step 1: Open a web browser and enter your Cloudflare Tunnel’s assigned domain name. You can find this in the Cloudflare Dashboard under “Tunnels” in the “Network” tab. Uou should see a Healty tunnel if everything is set up correctly.
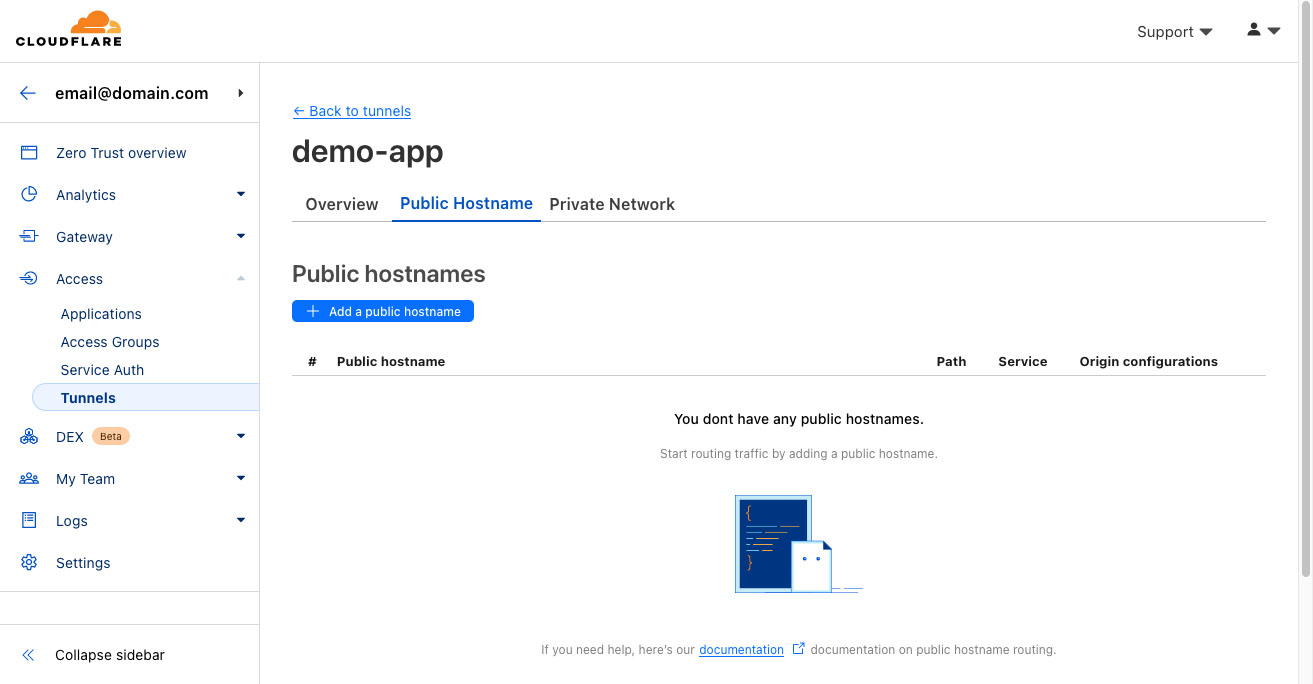
Step 2: Go modify that tunnel to configure a route to our new app. Navigate to Public Hostname and click “Add”.
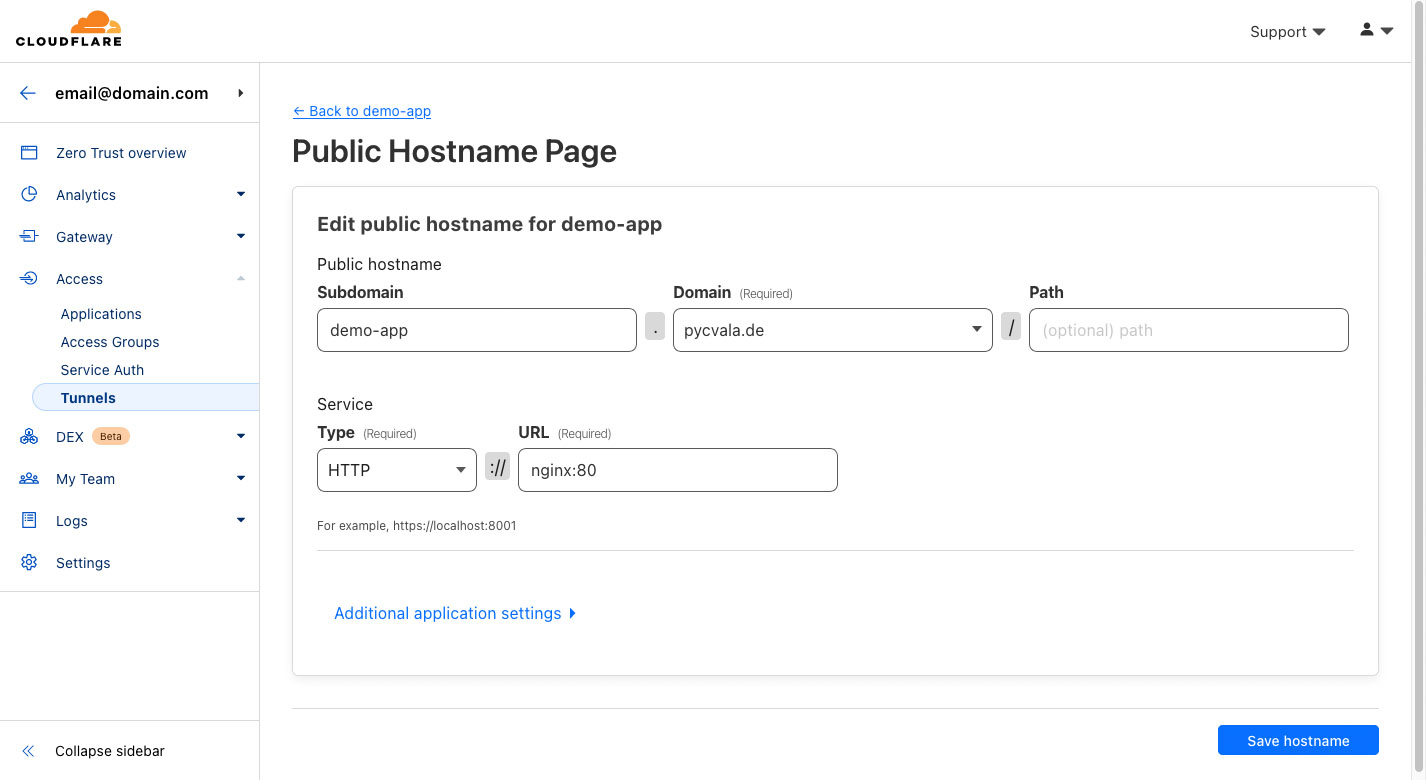
Step 3: Here is where you configure your public domain for the app we created. Here I’m using demo-app.pycvala.de as the domain. It will take care of SSL and HTTPS for us. Since we’re using Docker Compose, we can reference our app using Docker’s private DNS via the service name, here nginx followed by the port 80 exposed by the container.
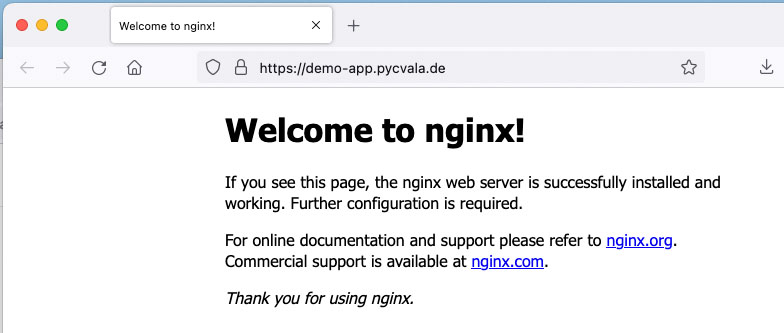
Step 4: Hit save. If everything went well, you should see your locally hosted web application accessible via the Cloudflare Tunnel’s domain name over HTTPS.
Understanding the Benefits
By now, you have a fully functional web application accessible through Cloudflare Tunnels. However, let’s take a moment to appreciate the benefits of using this setup:
- Security: Cloudflare’s global network provides powerful DDoS protection and WAF capabilities, shielding your application from malicious attacks.
- Performance: Cloudflare’s CDN ensures that content is cached closer to users, resulting in faster loading times and improved user experience.
- Scalability: Cloudflare’s robust infrastructure scales seamlessly with your application’s demands, eliminating worries about sudden traffic spikes.
- Flexibility: By using Docker Compose, you can easily customize and manage multiple containers, simplifying the process of deploying complex applications.
Final Thoughts
In this tutorial, we explored the power of Cloudflare Tunnels and Docker Compose in deploying web applications securely and efficiently. By leveraging Cloudflare’s global network and Docker’s containerization capabilities, you can confidently expose your locally hosted web applications to the world. Remember to keep your Cloudflare Tunnel token secure, as it grants access to your Cloudflare resources.
With the knowledge gained from this tutorial, you are now equipped to deploy your applications with enhanced security and performance. Embrace the power of Cloudflare Tunnels and Docker Compose to optimize your web application deployment process. Happy coding and exploring the vast possibilities that these tools offer!